
NEWS
Why Does a Sausage Clipper Jam? Common Causes and Production Fixes
Why Does a Sausage Clipper Jam? Common Causes and Production Fixes
A Sausage Clipper jam can quickly disrupt throughput, compromise product consistency, and increase maintenance costs. For technical evaluators, identifying the root cause—whether it involves clip quality, casing alignment, pneumatic pressure, tooling wear, or improper machine setup—is essential for restoring reliable production. The difficult part is that a jam often appears at the clipper, while the condition that created it may have started upstream at filling, portioning, or casing preparation.
In practice, repeated clipping faults should not be treated as a simple “machine problem.” A clipper is working at the meeting point of product flow, casing tension, clip geometry, pneumatic force, and mechanical timing. If one variable moves outside its acceptable range, the unit may begin to misfeed clips, fail to close them evenly, trap casing in the tooling, or stop on an overload signal. The fastest repair is not always the best correction.
Start by Identifying the Exact Jam Pattern
Before changing settings, observe where the jam occurs. This sounds basic, but it prevents a lot of wasted intervention. A clip that does not leave the magazine points to a different issue than a clip that reaches the closing die but crushes the casing. Likewise, a machine that runs normally for twenty minutes and then begins jamming is often dealing with contamination, heat-related air loss, inconsistent product pressure, or gradual clip-track resistance—not a fixed setup error.
Useful inspection questions include:
- Does the clip jam in the rail, at the punch, or after closure?
- Is the casing centered in the clipping zone at the moment of actuation?
- Are faults limited to one clip batch, one casing type, or one product formulation?
- Does the problem appear only at higher operating speed?
- Are there visible marks on the casing, uneven clip legs, or product trapped in the die area?
These observations help separate a feed issue from a process-synchronization issue. A technician who immediately increases air pressure may temporarily force the mechanism through the cycle, but that can accelerate wear or damage casing if the actual fault is poor alignment.
Clip Quality and Magazine Feed Problems
Incorrect, damaged, or poorly stored clips are among the most common causes of a Sausage Clipper jam. Clips must match the machine’s specified profile and size. Even when a substitute clip looks similar, small differences in wire diameter, crown shape, surface finish, or stick spacing can interfere with the magazine, punch, or die. This is particularly noticeable on high-speed lines, where there is less tolerance for inconsistent feed resistance.
Inspect clip sticks for deformation before loading. Bent clips, rough burrs, moisture exposure, or loose debris in the clip channel can prevent smooth movement. Do not assume that a full magazine is better: overloading can add friction or affect spring pressure on certain designs. Clean the feed rail with materials appropriate for food-processing equipment, then confirm that no cleaning residue remains where clips travel.
When a line changes from one clip format to another, the tooling, rail guides, punch components, and adjustment settings may also need to change. Mixing old setup parts with a new clip format is a predictable source of intermittent jams.
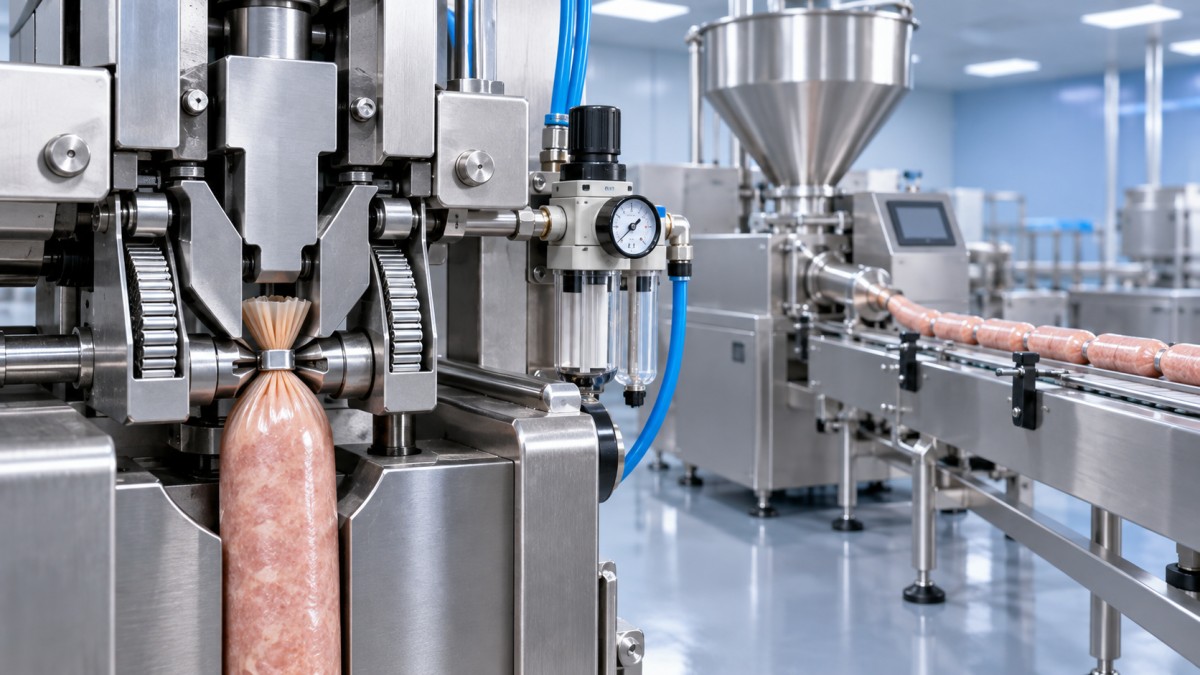
Casing Alignment Is Often the Hidden Cause
The clipper can only close reliably when the casing enters the clipping zone in a controlled position. If the casing is twisted, off-center, excessively taut, or carrying too much product at the neck, the clip may close unevenly or the casing may be pulled into the tooling. Fibrous, collagen, cellulose, and plastic casings respond differently to tension and compression, so a setting that works for one product should not automatically be transferred to another.
A common production-floor mistake is trying to cure poor casing presentation by slowing the clipper alone. In many cases, the upstream filler, portioning device, brake, or casing holder is the source of the instability. Check whether the casing is being held consistently before clipping, whether the product tail is properly displaced, and whether the portion length controller is synchronized with the clipping cycle.
Product viscosity also matters. Coarse emulsions, products with visible inclusions, and formulations that vary in temperature can change filling pressure and neck formation. If the neck is too full, the clipper is being asked to compress product as well as casing. That increases the chance of incomplete closure, tool contamination, and subsequent jamming.
Pneumatic Pressure: Check Stability, Not Just the Gauge Reading
Insufficient pneumatic pressure can produce weak or incomplete clip closure. However, the nominal pressure shown at the machine is only part of the picture. A supply line may show an acceptable reading when idle but drop during repeated cycles because of undersized air supply, leaks, a restricted filter, water accumulation, or another pneumatic consumer operating at the same time.
Monitor pressure during actual production, especially at the highest planned clipping frequency. Drain moisture from the air preparation unit according to site procedures and inspect filters, regulators, hoses, fittings, and solenoid valves. Contaminated or wet compressed air can cause sluggish cylinder response, which may look like a mechanical timing fault. Raising pressure above the equipment recommendation should not be the default response; it can place unnecessary load on punches, dies, seals, and moving joints.
Tooling Wear and Product Build-Up Cannot Be Ignored
Punches, dies, separators, guides, and knife-related components operate under repeated impact and compression. Wear may develop gradually enough that operators compensate with small setting changes until the clipper becomes unreliable. Look for rounded edges, scoring, excessive clearance, loose mounting, or a closure shape that has changed from normal production samples.
Build-up is another frequent culprit, particularly with higher-fat products or when product enters the clipping zone. Deposits can prevent the casing from seating correctly and can obstruct clip movement. A cleaning routine should include the parts that are not immediately visible during normal operation: the clip rail, die cavity, guides, sensor areas, and casing-control components. Equipment built with smooth SUS304 stainless-steel surfaces is easier to maintain hygienically, but accessible design does not eliminate the need for disciplined cleaning and inspection.
Check the Filler-Clipper Relationship Before Blaming Either Machine
On integrated sausage lines, clipping stability depends heavily on how the filler delivers product. A filler that surges, introduces inconsistent portion pressure, or loses synchronization with the length controller can create irregular necks that the clipper cannot handle consistently. This is why a fault may disappear when the line runs slowly, then return as speed increases.
For example, a vacuum filling system can help reduce air in the meat mass and support more consistent filling behavior when correctly adjusted. The Sausage Filler range includes GZY3000 and GZY6000 configurations with vacuum filling, automatic casing knot tying, and connection options for sausage length controllers and double clipping machines. With stated capacities of 3600 kg/h and 6000 kg/h respectively, these configurations require matching downstream equipment settings to the actual product flow rather than assuming that maximum filler output is the correct operating point for every casing and clip format.
When evaluating a line, review the filler output, portion target, clipping cycle, and conveyor or hanging-machine speed as one sequence. A stable individual machine does not guarantee a stable system.
A Practical Recovery Sequence
After safely stopping and isolating the machine according to the site’s procedures, remove the jammed clip and casing without forcing tooling out of position. Clean the affected area, inspect the clip path and die surfaces, then manually verify movement where the manufacturer permits it. Reload known-good clips, confirm casing alignment, and restart at a controlled speed. If the fault returns, record the exact cycle point and the product condition rather than repeatedly resetting the machine.
For recurring issues, keep a simple fault log that records clip type, casing type, product batch condition, air-pressure behavior, speed, and replaced parts. It is more useful than a generic “jam alarm” history because it reveals whether the failure follows a material, a recipe, a shift practice, or a mechanical component.
A reliable Sausage Clipper is rarely maintained through one adjustment alone. The durable fix usually comes from restoring the basic conditions: correct clips, clean and unworn tooling, stable air, centered casing, and synchronized product delivery. If those conditions are verified in that order, most clipping faults become much easier to diagnose—and less likely to return during a demanding production run.
Product Center
Leave a message online